
Kling 4.0 Omni Reference Guide
Kling4 TeamPublished on
Table of Contents
Omni Reference is how you hand Kling 4.0 your own material. A photo of a person, a product shot, a rough sketch of the framing or a clip whose camera move you want can all go into one generation, and the prompt tells the model what each one is for. If you'd like to try Kling 4.0 with references as you read, open it in another tab. Kling's platform accepts up to 15 references per task. On Kling4 a reference set takes up to 10 images and up to 5 clips, though today's composers attach one clip per run.
This guide covers what the feature does, the limits on each platform, how the @ tags work in our composer, what a reference clip does to the price, how to write the prompt, and the usual reasons a reference gets ignored or misread.
What Omni Reference is
On Kling's own platform, Kling 4.0 has two entry points. Omni Reference is the default one, and the Kling 4.0 user guide says it also covers plain text-to-video and keyframe-to-video. The other entry is Keyframes, which pins up to ten images to positions on the timeline. You choose one or the other for each task; they can't be combined.
The difference is about control. A keyframe is a promise about a specific moment: at this point in the clip, the frame looks like this image. A reference is source material. The person in your photo can turn, walk out of frame and come back in a different light; the product can appear in the second shot instead of the first; a sketch can fix where things sit without lending any of its line-drawing look. The model reads your prompt to decide how each reference is used, which is why the prompt matters more here than in any other mode.
Kling's release note lists the kinds of material it accepts beyond ordinary photos and footage: three-view character sheets, image grids, storyboards, wireframes, grey-box ("white-model") videos and depth-map videos.
Limits on Kling's platform and on Kling4
| Kling's platform | Kling4 | |
|---|---|---|
| Reference images | Up to 10, each up to 30 MB, shape between 2:5 and 5:2 | Up to 10 |
| Reference clips | Up to 5, each 3–30 s, 30 s in total, each up to 300 MB | Up to 5 accepted, 30 s in total; each 3–30 s and up to 200 MB. The composers currently attach one clip per run |
| Voice profiles | Up to 3 per task, made from 5–30 s of audio | Not available |
| Elements | Up to 7, including up to 3 video elements | Not available |
| Most references in one run | 15 of all kinds combined | 15 accepted (10 images, 5 clips); 11 through today's composers |
| Prompt | Up to 8,000 tokens | Up to 2,500 characters |
| Output | 3–30 s; 720p, 1080p or 4K | 3–30 s; 720p or 1080p; 16:9, 9:16, 1:1 or 21:9 |
On Kling's platform, reference clips, clips you are editing and video elements all draw on one shared allowance of 5 clips and 30 seconds. Kling4 has no video editing or elements, so on Kling4 the 30 seconds belong to your reference clips alone.
Image references and video references do different jobs
Use images for what things look like: a face, an outfit, a bottle, a room, a palette, a layout. Use clips for what happens over time: how a body moves, where the camera travels, when the cuts land. Kling's own demo prompts split the work this way. One prompt in the user guide names its clip "the reference for camera, motion, timing and cuts" and uses an image as the first frame.
They are also billed differently on Kling4. Reference images add nothing to the price. A reference clip changes both the rate and the number of seconds you pay for, which is covered below.
How @Image and @Video tags work on Kling4
First, Kling4 decides what your uploads are from what you attach. One image is read as the first frame, and two as the first and last frame. A third image, or any clip, turns the uploads into a reference set. In the video workspace you can override that: each frame carries a Start or End badge, and choosing "Use as reference image" on it moves your frames into the reference set, so one or two images can be references too.
Then the tags. In the video workspace, type @ in the prompt and a "Reference uploads" menu lists everything you've added. Pick one and it drops in as a chip that reads @Image 1, @Image 2 or @Video 4, and each thumbnail shows the same number. Images are counted first and the clip continues the count, so with three images the clip is @Video 4. Chips renumber themselves when you add or remove an upload; text you typed by hand does not.
The generator built into our tool pages is a plain prompt box with no @ menu. Type the tags yourself, in the order you added the files: @Image 1 for the first image, @Image 2 for the second, @Video 1 for the clip. Spacing and capitals don't matter, so Kling's own "@Image1" style works too.
Either way, Kling4 rewrites the tags into the format the API expects before the run reaches the model. With three images, @Video 1 and @Video 4 both land on the first clip, so with a single clip the two numbering styles can't collide.
Two habits avoid most tagging mistakes:
- Re-check every tag after you change the uploads. Removing the second image turns a hand-typed "@Image 3" into a pointer at a different file, or at nothing.
- Give every upload a tag. An image with no tag still counts toward the set but has no job, and the model is free to ignore it or blend it into something else.
If you want an image to open the shot inside a reference run, tag it and say so in the prompt; Kling's camera-move demo opens by naming its image as the first frame. For a plain first frame with an optional last frame, our image to video page is the simpler route.
What a reference clip does to the price
Without a reference clip, Kling 4.0 on Kling4 costs 3 credits per second at 720p and 5 at 1080p, counted on the length of the output. As soon as a clip is in the set, the rate drops to 1.8 credits per second at 720p and 3 at 1080p, but the seconds you pay for become the output length plus whichever is longer: your clips in total, or the output.
| Run | Seconds billed | Credits |
|---|---|---|
| 10 s at 720p, images only | 10 | 30 |
| 10 s at 720p, one 6 s clip | 10 + 10 = 20 | 36 |
| 10 s at 720p, clips adding up to 25 s | 10 + 25 = 35 | 63 |
| 10 s at 1080p, one 6 s clip | 10 + 10 = 20 | 60 |
| 30 s at 1080p, 30 s of clips | 30 + 30 = 60 | 180 |
Two things follow from the arithmetic. While your clips are no longer than the output, a clip costs 20% more than the same run with images only. Past that point, every extra second of reference footage adds 1.8 credits at 720p or 3 at 1080p. So trim a reference clip to the stretch that shows the move you want before you upload it; the model doesn't need the run-up.
Writing reference prompts
The model sees a pile of files and a paragraph. Your job is to make the link between them impossible to misread.
- Give each reference one role. "@Image 1 is the presenter", "@Image 2 is the product", "@Video 4 is the camera move". When a single reference has to supply a face, a jacket and a background, the model has to guess which of those you care about.
- Name the role in the first sentence that mentions the reference, then keep using the tag. "The presenter from @Image 1 picks up the bottle from @Image 2" beats "she picks it up".
- Say what to take and what to leave. "Keep her face and green jacket; ignore the background" stops a studio backdrop from following a character into a forest.
- Order the prompt: roles first, then the action, then the camera, then sound and dialogue.
- Write what no reference can show. Motion, timing, dialogue and sound come from your words. Kling4 has no voice profiles, so describe the voice: age, pace, accent. Kling lists American, British and Indian English accents for Kling 4.0.
- Stay under 2,500 characters. Kling's own demo prompts are written for an 8,000-token limit, so long ones need cutting before they fit here.
A character, a product and a location in one shot:
@Image 1 is the presenter: keep her face, short grey hair and green field jacket. @Image 2 is the product, a matte black steel water bottle; keep its shape, bamboo cap and white logo exactly. @Image 3 is the location, a rooftop garden at dusk; use its skyline and string lights, not the people in it. The presenter from @Image 1 lifts the bottle from @Image 2 to shoulder height, turns the logo to the camera and says, in a calm British accent, "This one comes everywhere with me." Slow push-in from a medium shot to a close-up of the bottle. Soft traffic noise from the street below.
A camera move borrowed from a clip, with a new subject (one image, so the clip is @Video 2):
@Video 2 is the reference for the camera path, pacing and cut points only; do not copy its rider, bike or road. @Image 1 is the character: a woman in her sixties in a red cycling jersey and white helmet. Recreate the descent from @Video 2 with the woman from @Image 1 riding a steel road bike down a coastal switchback, same chest-height tracking camera, same cuts. Gravel crunch, wind, her breathing.
A storyboard grid read as a shot list. On its own a single image is read as a first frame, so in the video workspace switch it to a reference before you send:
@Image 1 is a four-panel storyboard, read left to right, top to bottom. Turn each panel into one shot, in that order, about three seconds each, keeping each panel's framing. Panel 1: a boy at a bus stop in the rain. Panel 2: the bus pulls away without him. Panel 3: close-up of his soaked sneakers. Panel 4: an old woman lifts her umbrella over him. Muted colors, light rain throughout, no music.
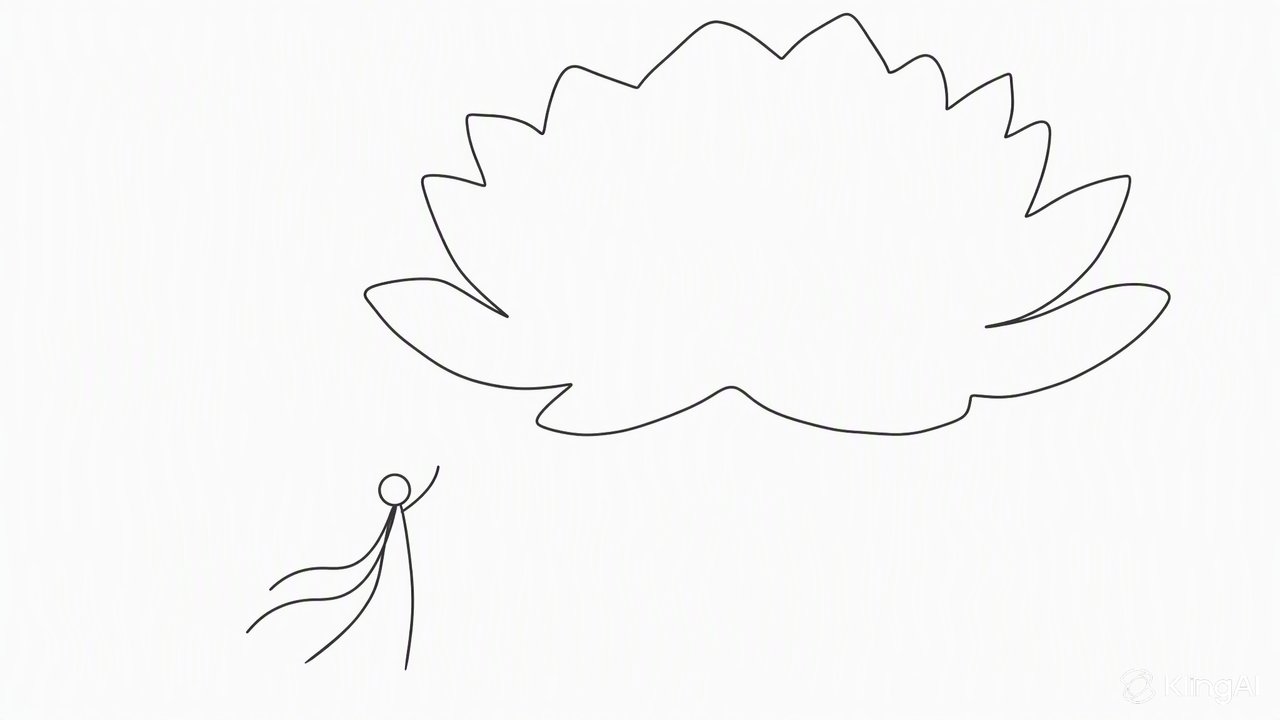
Kling's own composition demo works the same way with two rough line sketches. The first sets the opening wide shot: a huge bloom high in the frame and a small figure low on the left. The second sets what follows, an overhead view of a figure lying inside the flower.
 Reference image 1
 Reference image 2
The sketches fix only where things sit. Everything you see (moonlight, petals, robes, sparkle) comes from the prompt, which opens: "Shot 1 (5s): Use Reference Image 1 for composition." On Kling4, two images on their own are read as first and last frame, so switch both to references in the video workspace and tag them @Image 1 and @Image 2.
Demo by Kling AI · Kling 4.0 user guideReference types Kling documents
- Characters. Three-view sheets (front, side and back on one image) are on Kling's list of accepted inputs. Kling's keyframes demo of a wanderer on a misty ridge opens its image set with one, which you can see in our Kling 4.0 release overview. On Kling's platform, elements and voice profiles can carry a character further; on Kling4, use one clear image per character.
- Products. Kling's Kling 4.0 developer page shows a sneaker ad built from three reference images, and the user guide has a presenter pitching a puffer jacket from one reference image.
- Scenes and layout. Wireframes, grey-box videos (untextured blocks standing in for the set) and depth-map videos are all accepted, which lets you fix the geometry of a space before any of it is designed.
- Storyboards and image grids. Several panels on one image, read as a sequence, as in the third prompt above.
- Style. Kling's felt-craft demo restyles a whole clip to match one image. That one uses video editing, which Kling4 doesn't have; on Kling4 you can attach a style image as a reference for a new clip and say which qualities to match.
- Composition. A sketch or a photo used only for framing, as in the lotus demo.
- Motion and camera from a clip. The user guide's office-chair demo copies a clip's camera, motion, timing and cuts onto a new first frame, and the developer page combines two images with a basketball clip. If what you need is one character performing the moves from a clip, the motion control tool on Kling4 is built for that job and runs Kling's Motion Control models.
- Voice. Up to three voice profiles per task on Kling's platform, each built from 5 to 30 seconds of audio. Not available on Kling4.
Common failure modes and how to fix them
Your images were used as frames
One or two images with no clip are read as a first frame, or a first and last frame, so the clip starts on your product shot instead of using it as a reference. Add the third image or the clip you were planning to use, or switch the frames to references in the video workspace.
The wrong reference shows up
Usually the tag no longer points where you think. Typed tags don't follow uploads around, so deleting the second image turns your old "@Image 3" into nothing or into a different file. After any change to the set, re-type the tags in upload order, or rebuild them from the @ menu in the workspace and compare each chip with the thumbnail numbers.
Two characters blend into one
Two similar faces, or a prompt that slips into "she" and "they", can let features drift from one person to the other. Give each person a distinguishing line (hair, clothing, age), repeat their tag in every sentence where they act, and keep them physically apart in the first shot.
The reference arrives with its baggage
A character photo taken against a white wall can bring the wall along; a product shot can bring its studio lighting into a night scene. Spell out the parts to take ("face and outfit only") and the parts to drop ("ignore the background and the lighting").
A reference is ignored
Every reference needs a job in the prompt. An untagged upload gives the model no reason to use it, and a 5-second clip rarely has room for eight references. Remove the ones that aren't doing anything, or make the clip longer.
The clip's original subject appears
If a motion or camera clip shows a person, the model may keep that person. Say which aspects to copy ("camera path and cut points only"), describe the replacement in full, and give the new subject its own image.
The upload is refused
On Kling4 a reference clip has to run 3 to 30 seconds and stay under 200 MB, and a set stops at 10 images. Trim or compress the clip, or drop the images that aren't doing a job.
The prompt won't fit
Kling's showcase prompts often open with long scene-setting blocks written for an 8,000-token limit. Kling4 takes 2,500 characters, so cut the repetition and keep the roles, the action and the camera.
The framing fights the reference
The output follows the aspect ratio you choose (16:9 unless you change it), not the shape of your images. If your main reference is a tall portrait, pick 9:16 rather than asking for a wide frame.
The bill is higher than you expected
With a clip attached you always pay for at least twice the output length, and once your clips run longer than the output, every extra second of footage is billed as well. Trim each clip to the part that matters, and leave a clip out entirely when an image can say the same thing.
- #Kling 4.0
- #Omni Reference
- #Reference images