
How to Use Kling 4.0
Kling4 TeamPublished on
Table of Contents
This tutorial takes one Kling 4.0 run on Kling4 from an empty prompt box to a saved video file. Open the Kling 4.0 generator in another tab and follow along; your first clip needs no account. Each step describes what the controls actually do today, including a few spots where they behave differently from what you might expect, such as when an uploaded picture counts as a frame and when it counts as a reference.
Kling4 is an independent site that runs Kling AI's model through its API, so some features Kling announced for 4.0 aren't offered here. Our Kling 4.0 release overview lists those gaps. Everything in this guide works now.
Where Kling 4.0 runs on Kling4
Two surfaces send your prompt to the same model:
- The page generators. The prompt box at the top of the home page starts from text; the one on the image to video page puts a large upload panel first. Both work signed out, and both host the free no-login clip.
- The workspace at /ai-video-generator. It has a taller prompt editor, Start and End badges on your frames, an @ menu for tagging uploads, an Optimize button for rewriting a draft, and a ×1 picker for several takes at once. Generating there always needs an account.
Once you're signed in, the first Create you click on a page generator in a given browser renders on that page. After that, Create opens the workspace with your prompt, uploads and settings already filled in, so where you begin matters less than it looks.
Step 1: Choose what you start from
There's no mode switch to set. Kling4 works out what your uploads are for by counting them:
| What you attach | How Kling4 reads it | Works for the free clip? |
|---|---|---|
| Nothing, only a prompt | Text to video | Yes |
| One image | First frame: the clip opens on it | Yes |
| Two images | First and last frame, in the order you added them | No, sign in first |
| Three or more images, or a video clip | Reference set: the files guide characters, products, places or motion | No, sign in first |
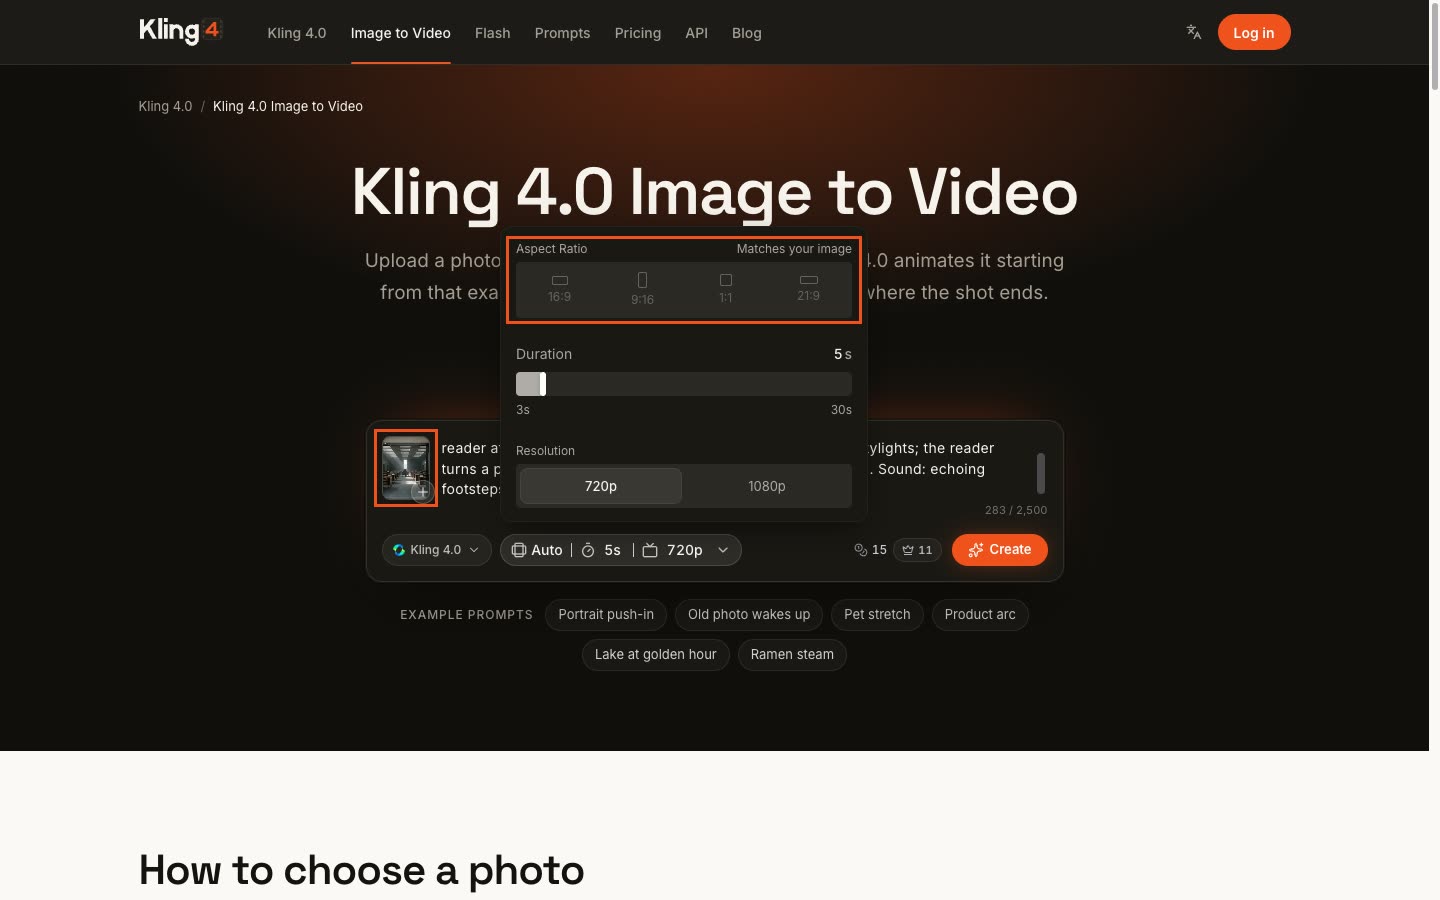
With a first frame, the photo sets the shape. As soon as one or two pictures are attached, the ratio control switches to Auto, its options grey out and the settings panel says "Matches your image". Kling 4.0's image route takes the frame from the picture, so a 16:9 photo gives a 16:9 clip. Crop the photo to the shape you want before you upload it. Picking the photo itself, and writing motion for a still, are covered in depth on Kling 4.0 image to video.
Two images should share a camera position. The model invents everything between the first frame and the last, so the closer the two are in angle and light, the less it has to make up. In the workspace each frame carries a Start or End badge; check the order before you spend credits. The pair below is the opening still of a library clip we generated on Kling4 and a frame from near its end.
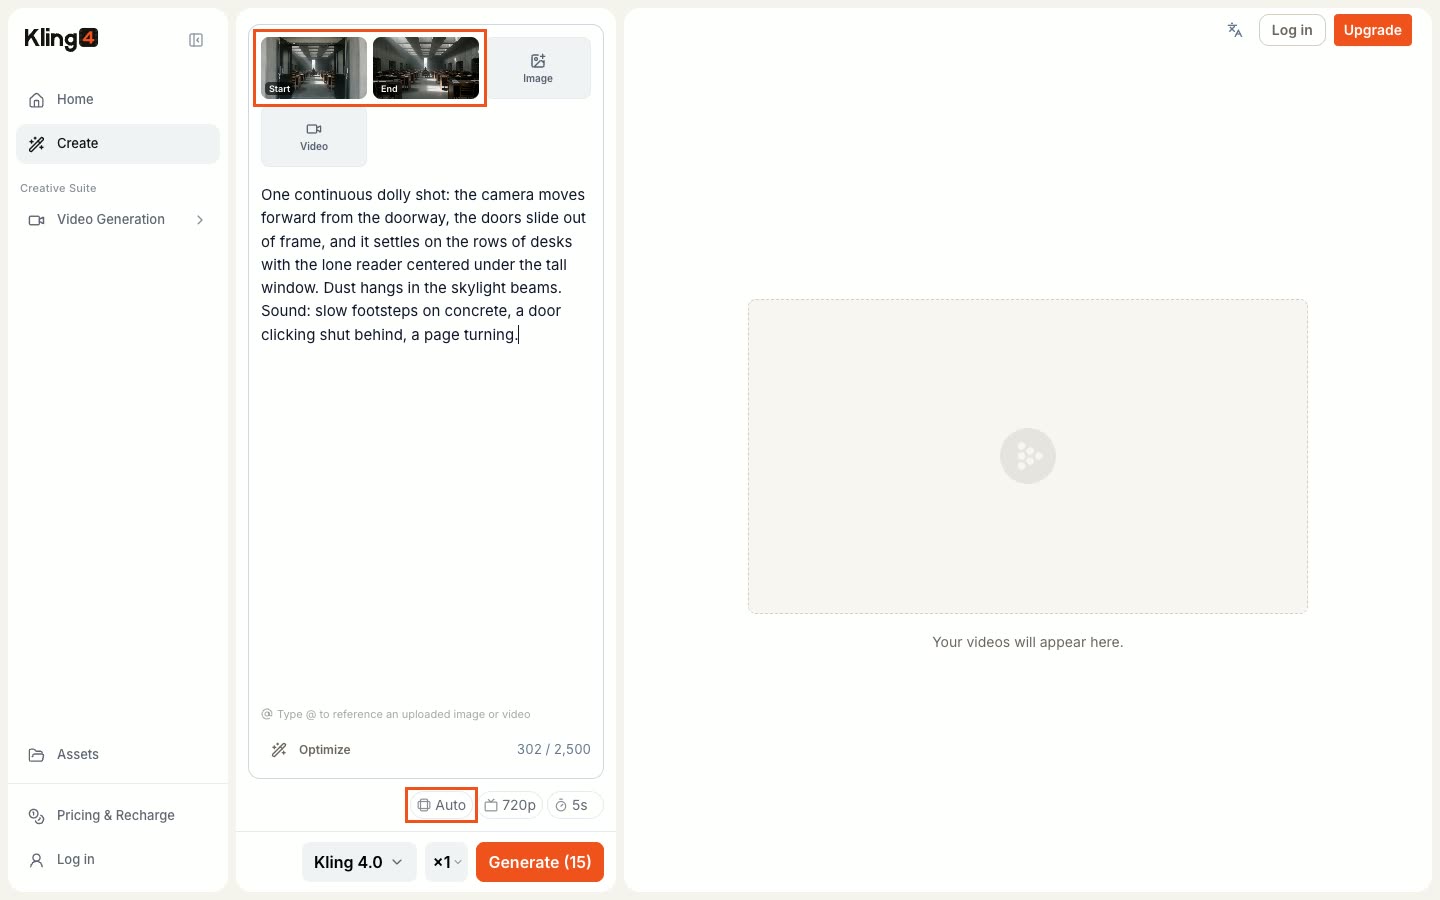
One continuous dolly shot: the camera moves forward from the doorway, the doors slide out of frame, and it settles on the rows of desks with the lone reader centered under the tall window. Dust hangs in the skylight beams. Sound: slow footsteps on concrete, a door clicking shut behind, a page turning.
References do a different job. Three or more images, or any clip, stop acting as frames and become material your prompt assigns roles to, such as "the woman from @Image 1" or "the camera move from @Video 4". Kling4 takes up to 10 images and attaches one clip per run. To use just one or two pictures as references instead of frames, open the workspace and choose "Use as reference image" on the frame's badge. Tagging, roles and the billing of a reference clip are explained in the Omni Reference guide.
Step 2: Write the prompt
Before you click, read your draft against this list:
- Can you picture the first second? If you can't say where the camera is and what's in frame when the clip opens, the model can't either.
- Is there roughly one main action per five seconds? Kling 4.0 fills whatever length you give it. One gesture stretched over 20 seconds turns into drift, and five actions packed into 5 seconds get skipped or blurred together.
- Does the camera have an instruction? Name one move, or say that it stays still.
- Did you write the sound? Every Kling 4.0 clip on Kling4 comes with audio and there's no switch to turn it off. Leaving sound out of the prompt just means the model chooses it for you.
- Is each spoken line in quotes, with a named speaker? Anything unquoted may be read as description rather than speech.
- Does every upload have a job in the text? Frames work without tags; references need them.
- Is it under 2,500 characters? Both prompt boxes count as you type, and an over-long prompt is refused when you submit it.
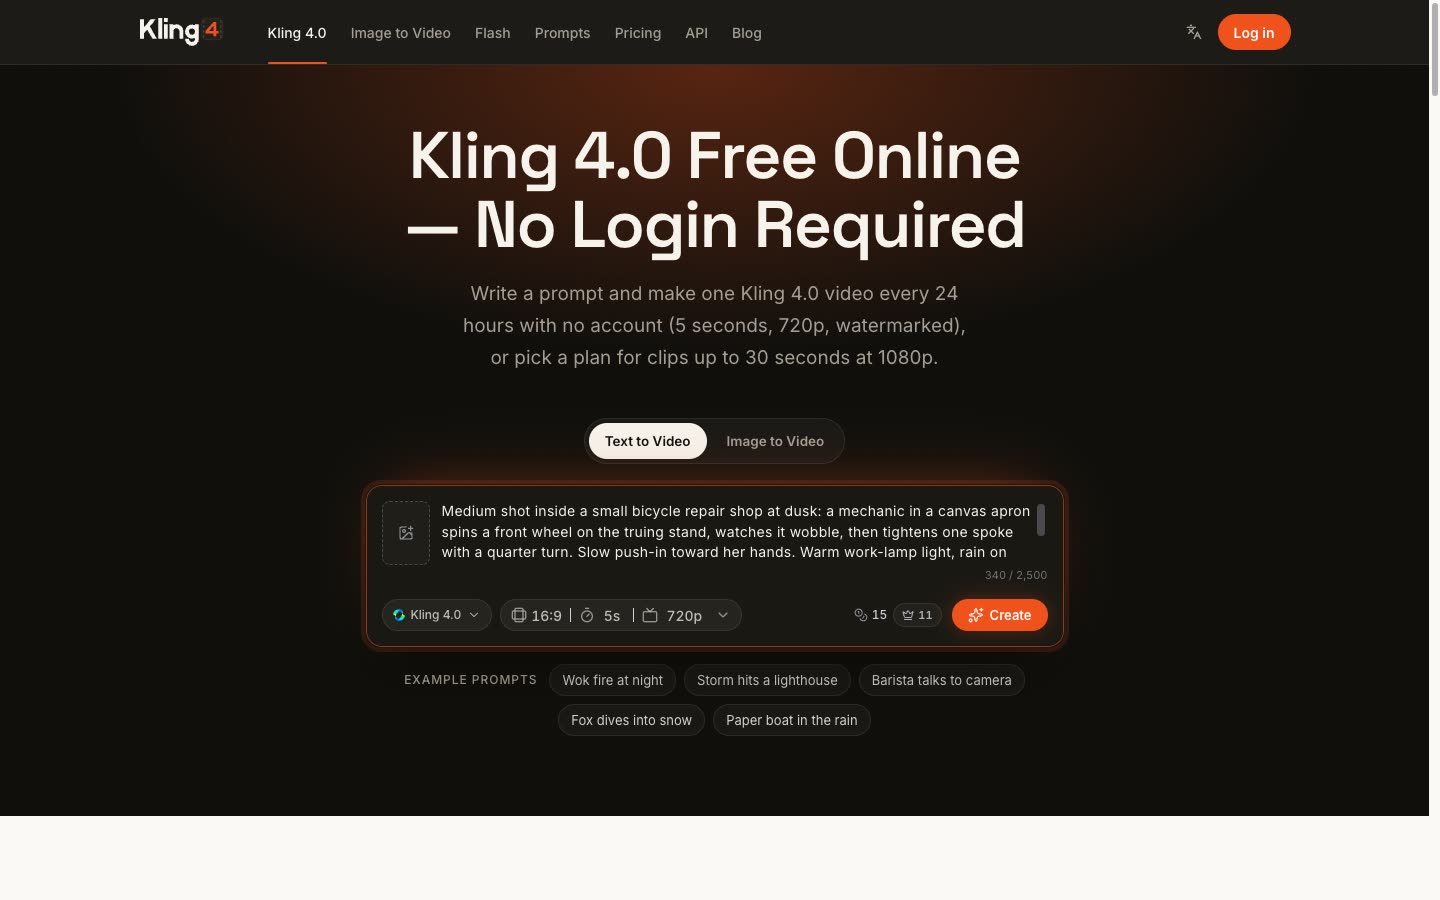
The prompt in the screenshot below follows the list: framing first, one action, one camera move, the light, then three sounds.
Medium shot inside a small bicycle repair shop at dusk: a mechanic in a canvas apron spins a front wheel on the truing stand, watches it wobble, then tightens one spoke with a quarter turn. Slow push-in toward her hands. Warm work-lamp light, rain on the shop window. Sound: the freewheel ticking, rain, a radio playing quietly in the back.
For tested prompts to borrow, each shown next to the clip it produced and with notes on where the model followed or drifted, browse the Kling 4.0 prompt library. "Use this prompt" on a card copies its text into the generator; set the length and ratio yourself to match the card.
Step 3: Set length, aspect ratio and resolution
Click the settings pill beside the model name. It reads 16:9 · 5s · 720p until you change something, and it opens a panel with three controls:
- Aspect Ratio: 16:9, 9:16, 1:1 or 21:9. Choose the shape of the place the clip will end up: 9:16 for Reels, Shorts and TikTok, 1:1 for a square feed post, 21:9 for letterboxed, film-style framing. With one or two pictures attached it reads Auto instead, as Step 1 explains.
- Duration: a slider from 3 to 30 seconds in whole seconds. You can also type the number straight into the box above it.
- Resolution: 720p or 1080p.
You won't find a sound switch or a 4K option; neither is part of Kling 4.0 on Kling4.
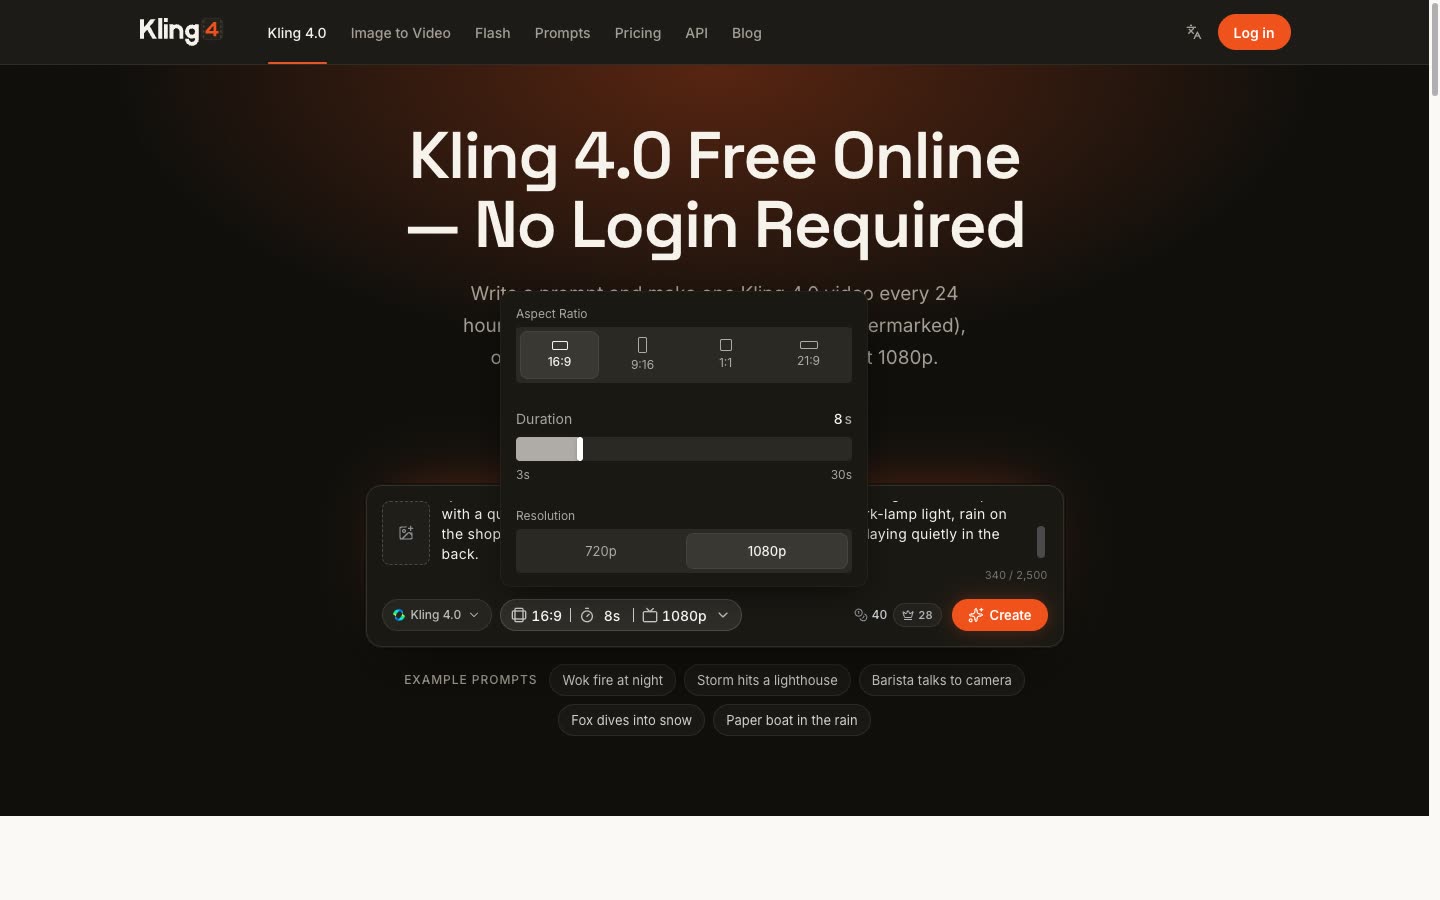
On the free no-login clip the panel opens on 5 s and 720p and offers 16:9, 9:16 or 1:1. Longer lengths, 1080p, 21:9 and the other models stay in view behind a lock, and choosing any of them opens the log-in.
On paid runs, a sensible habit is to test an idea at 720p and the shortest length that fits the action, then re-run the version you like at 1080p and full length. A 720p draft costs three fifths of the same length at 1080p.
Step 4: Check what the run will cost
The number beside the coin icon next to Create is the estimate for your current settings, and it updates as you change them. Kling 4.0 is billed per second of output:
| Settings | Rate | Credits |
|---|---|---|
| 5 s at 720p | 3 a second | 15 |
| 8 s at 1080p | 5 a second | 40 |
| 15 s at 720p | 3 a second | 45 |
| 20 s at 1080p | 5 a second | 100 |
Reference images add nothing to that. A reference clip moves the run to a lower rate charged on more seconds, which usually ends up costing more; the Omni Reference guide linked above has the worked numbers.
The second figure, behind the crown icon, is what a Pro member would pay for the same settings. Subscriptions take a percentage off every run, and the plan cards on Kling 4.0 pricing show how much, next to the one-time credit packs. Two things are worth knowing before you buy. A free account can't run Kling models by itself: you need a plan or a Creator pack or larger, because the Starter pack only tops up a plan. And a failed generation isn't charged; any credits taken for it go back to your balance on their own, as the help article on how credits work explains.
Step 5: Generate
Without an account
When the free clip is available to you, the button reads Create for Free · No Login and the settings are fixed to Kling 4.0, 5 seconds and 720p. After you click:
- A Cloudflare check runs in the background. If Cloudflare wants a click, a checkbox appears under the composer.
- The clip joins a short queue. The card under the composer shows your position and the expected wait, and logging in at that point starts the clip at once.
- The finished clip plays in place, with sound and a watermark.
You get one clip in any rolling 24 hours, tracked by network and by device. If the safety check stops your prompt or photo before rendering starts, the card says "Stopped by the safety check" and the free clip isn't spent, so you can reword the prompt or swap the picture and try again. Photos of real people are among the things it may turn down.
With an account
In the workspace the button reads Generate with the cost in brackets, such as Generate (15) for the default 5 seconds at 720p. The ×1 picker beside it runs 2, 4 or 8 takes of the same prompt in one click, each billed in full, up to the number of videos your plan can run at once: one on Lite and on credit packs, four on Pro, eight on Premium. Signed-in runs don't wait in the free queue.
If your draft is thin, the Optimize button under the prompt rewrites it with more detail on the scene, camera and light. Read the rewrite before you send it: the run follows what the text says, not what you meant.
Step 6: Watch and download
The free clip plays in the generator with a "Log in to download the watermark-free video" badge. Log in within 7 days of making it and a clean copy is saved to your videos at no cost; the card then shows Download and Open my videos. Until you log in there's no download button.
Account runs show up in the workspace preview with a column of actions on the right: Reuse, Prompt, Media, Reference and Download. Download saves the video file. Your past runs also stay in your library, under Assets in the workspace sidebar.
Step 7: Iterate without starting over
That action column is built for second attempts:
- Reuse puts the original prompt, uploads and settings back into the composer without generating, so you can change one thing and run again.
- Prompt copies only the text and leaves your current uploads and settings alone.
- Media brings back only the files you uploaded.
- Reference adds the finished clip to the composer as a reference video, handy for restaging the same motion with a new subject or setting. It's billed as a reference clip, as described in Step 4.
Change one variable per run. If you rewrite the prompt, move the camera and switch to 9:16 at the same time, a better result won't tell you which change helped.
To carry a scene past 30 seconds, end one clip where the next should begin. Save a still of its final frame, upload it as the first frame of the next run, and write a prompt that picks up the action from there. Kling4 has no extend button, and Kling's own 2-minute extension is still marked coming soon.
Troubleshooting
"Today's free video is used up"
You've already had this 24-hour window's clip on this network or this device. Log in and run on credits, or come back once the 24 hours have passed.
"We couldn't verify your browser"
The Cloudflare check didn't pass. Click Try again, and tick the checkbox if one appears under the composer. If it keeps failing, pause content blockers for the page.
The clip came out the wrong shape
With one or two pictures attached, the clip follows the first picture's shape, which is why the ratio control shows Auto. Crop the photo to 9:16, 1:1 or whatever you need before you upload it. With text alone or a reference set, choose the ratio in the settings panel.
Your photos opened the clip instead of guiding it
One or two images are always read as frames at first. Add a third image, or switch the frames to references in the workspace with "Use as reference image".
Very little happens, or the scene wanders
A short prompt on a long clip leaves the model time to fill, and it fills it with drift. A crowded prompt on a short clip has the opposite problem. Match the number of actions to the length, or change the length to fit the actions.
The clip cuts to a new angle you didn't ask for
Kling 4.0 sometimes edits a scene into several shots on its own. Write "one continuous shot" when you need a single take. If you do want cuts, number the shots and give each one its seconds.
Dialogue sounds rushed
There are too many words for the seconds available. Shorten the line or lengthen the clip, and name the language if it isn't English.
The upload is refused
Frames and clips each have format, size and length limits, all listed in the FAQ on the image to video page linked in Step 1. A clip that's too long is the usual cause; trim it to the part that matters.
The prompt is refused as too long
The cap is 2,500 characters, and the count under the prompt box shows how far over you are. Cut repeated description before you cut action or sound.
The run failed
You weren't charged. Run it again, and if the same prompt fails twice, change the wording or the uploads before a third try.
When to switch to Kling 3.0 or motion control
Kling 4.0 is the default on Kling4 for its longer takes, 21:9 framing and reference sets, but two other tools do some jobs better. Both sit in the model menu of the generator, opened by clicking the model name next to the settings pill.
- Kling 3.0 when you need a 4K file: it's the only model on Kling4 with a 4K setting. It's also cheaper for clips of 15 seconds or less, at 2.5 credits a second at 720p against 3 for Kling 4.0. It stops at 15 seconds and has no 21:9 frame or reference set.
- Motion control when a character in your image should perform the exact moves from a video, such as a dance, a gesture or a stunt. Kling 3.0 Motion Control and Kling 2.6 Motion Control take one image and one clip and bill the clip's length, at 3 and 2 credits a second at 720p. Kling 4.0 with a reference clip can do a looser version that also borrows the camera and the cuts; that page compares the three.
- #Kling 4.0
- #Tutorial